Kubernetes High Availability Stateful WordPress
All the yaml files used in this tutorial are located here.
1. Deploying multi-master nodes (High Availability) K8S cluster
Follow this tutorial guide in order to deploy multi-master node (HA) K8S cluster.
The bare-metal server runs Ubuntu Server 16.04 and there are 7 Virtual Machines (VMs) will be installed on it. Both of the VMs also run Ubuntu Server 16.04.
- 3 master nodes
- 3 worker nodes
- 1 HAproxy load balancer
Nodes on K8s cluster:
master1@k8s-master1:~$ sudo kubectl get node
NAME          STATUS   ROLES    AGE   VERSION   INTERNAL-IP      EXTERNAL-IP
k8s-master1   Ready    master   20h   v1.13.5   10.164.178.161   <none>
k8s-master2   Ready    master   19h   v1.13.5   10.164.178.162   <none>
k8s-master3   Ready    master   19h   v1.13.5   10.164.178.163   <none>
k8s-worker1   Ready    <none>   19h   v1.13.5   10.164.178.233   <none>
k8s-worker2   Ready    <none>   19h   v1.13.5   10.164.178.234   <none>
k8s-worker3   Ready    <none>   19h   v1.13.5   10.164.178.235   <none>
2. Creating Persistent Volume Claims and Persistent Volumes
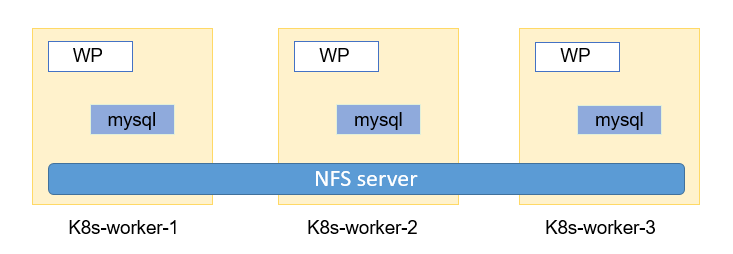
WordPress is a stateful application, so it relies on two persistent backends:
- Persistent volume storage
- MySQL database
A NFS server will be installed and configured that is accessible from all of the nodes on the K8s cluster.
Network File Storage
2.1. Installing and configuring NFS server
Installing NFS server on Linux machine (In this case, it will be installed on HA machine (IP: 10.164.178.238))
sudo apt install nfs-kernel-server
sudo mkdir -p /opt/data
sudo chmod -R 777 /opt/data
sudo chown -R nobody:nogroup /opt/data
Configuring NFS server
sudo vim /etc/exports

/opt/data *(rw,sync,no_root_squash,fsid=0,no_subtree_check)
sudo exportfs -a
sudo systemctl enable rpcbind
sudo /lib/systemd/systemd-sysv-install enable rpcbind
sudo systemctl enable nfs-server
sudo systemctl start rpcbind
sudo systemctl start nfs-server

sudo mkdir -p /opt/data/vol/{0,1,2}
sudo mkdir -p /opt/data/content
2.2. Auto-mounting NFS at boot-time
In each worker node, running the below commands.
sudo apt install nfs-common nfs-kernel-server
sudo systemctl start rpcbind nfs-mountd
sudo systemctl enable rpcbind nfs-mountd
sudo /lib/systemd/systemd-sysv-install enable rpcbind
Editing file /etc/fstab
sudo vim /etc/fstab
10.164.178.238:/opt/data        /mnt/data       nfs     rw,sync,hard,intr       0       0
sudo apt install autofs
sudo vim /etc/auto.master

/-    /etc/auto.mount
sudo vim /etc/auto.mount

/mnt/data -fstype=nfs,rw  10.164.178.238:/opt/data
Restarting autofs service
sudo systemctl start autofs
sudo systemctl enable autofs
sudo /lib/systemd/systemd-sysv-install enable autofs
2.3. Creating PVC and PV
Creating Persistent Volumes (PV) and Persistent Volume Claims (PVC) used by MySQL.
Firstly, provisioning 3 PVs that are based on NFS. The directory /opt/data/vol/0 will be assigned to the PV called mysql-pv0, the remaining PVs are: mysql-pv1 and mysql-pv2. Each PV will be claimed by a PVC, which will be mapped to the Pod Volume of the StatefulSet.
apiVersion: v1
kind: PersistentVolume
metadata:
  name: mysql-pv0
spec:
  capacity:
    storage: 1Gi
  accessModes:
    - ReadWriteMany
  persistentVolumeReclaimPolicy: Recycle
  nfs:
    server: 10.164.178.238
    path: /opt/data/vol/0

---
apiVersion: v1
kind: PersistentVolumeClaim
metadata:
  name: db-wordpress-mysql-0
spec:
  accessModes:
    - ReadWriteMany
  resources:
    requests:
storage: 1Gi
...
...
In order to provision the storage, execute the following command.
sudo kubectl create -f pv-pvc-mysql.yaml
The PVs and PVCs for MySQL are bound.
master1@k8s-master1:~$ sudo kubectl get pv
[sudo] password for master1:
NAME            CAPACITY   ACCESS MODES   RECLAIM POLICY   STATUS   CLAIM
mysql-pv0       1Gi        RWX            Recycle          Bound    default/db-wordpress-mysql-0
mysql-pv1       1Gi        RWX            Recycle          Bound    default/db-wordpress-mysql-2
mysql-pv2       1Gi        RWX            Recycle          Bound    default/db-wordpress-mysql-1
master1@k8s-master1:~$ sudo kubectl get pvc
NAME                             STATUS   VOLUME          CAPACITY   ACCESS MODES
db-wordpress-mysql-0             Bound    mysql-pv0       1Gi        RWX
db-wordpress-mysql-1             Bound    mysql-pv2       1Gi        RWX
db-wordpress-mysql-2             Bound    mysql-pv1       1Gi        RWX
Creating Persistent Volumes (PV) and Persistent Volume Claims (PVC) used by WordPress.
The directory /opt/data/content/0 will be assigned to the PV called wordpress-pv0, the remaining PVs are: wordpress-pv1 and wordpress-pv2 and they are claimed by wordpress-persistent-storage-0, wordpress-persistent-storage-1 and wordpress-persistent-storage-2 respectively.
apiVersion: v1
kind: PersistentVolume
metadata:
  name: wordpress-pv0
spec:
  capacity:
    storage: 1Gi
  accessModes:
    - ReadWriteMany
  persistentVolumeReclaimPolicy: Recycle
  nfs:
    server: 10.164.178.238
    path: /opt/data/content/0

---
apiVersion: v1
kind: PersistentVolumeClaim
metadata:
  name: wordpress-persistent-storage-0
spec:
  accessModes:
    - ReadWriteMany
  resources:
    requests:
      storage: 1Gi
...
...
In order to provision the storage, execute the following command.
sudo kubectl create -f pv-pvc-wordpress.yaml
The PVs and PVCs for WordPress are bound.
master1@k8s-master1:~$ sudo kubectl get pv
[sudo] password for master1:
NAME            CAPACITY   ACCESS MODES   RECLAIM POLICY   STATUS   CLAIM
wordpress-pv0   1Gi        RWX            Recycle          Bound    default/wordpress-persistent-storage-0
wordpress-pv1   1Gi        RWX            Recycle          Bound    default/wordpress-persistent-storage-2
wordpress-pv2   1Gi        RWX            Recycle          Bound    default/wordpress-persistent-storage-1
master1@k8s-master1:~$ sudo kubectl get pvc
NAME                             STATUS   VOLUME          CAPACITY   ACCESS MODES
wordpress-persistent-storage-0   Bound    wordpress-pv0   1Gi        RWX                           3d3h
wordpress-persistent-storage-1   Bound    wordpress-pv2   1Gi        RWX                           3d3h
wordpress-persistent-storage-2   Bound    wordpress-pv1   1Gi        RWX                           3d3h
3. Deploying MySQL
Creating a Secret for MySQL with the below yaml file.
apiVersion: v1
kind: Secret
metadata:
  name: mysql-pass
type: Opaque
data:
password: YWRtaW4=
Running
sudo kubectl create -f secret.yml
Deploying 3 instances of MySQL as a StatefulSet.
apiVersion: v1
kind: Service
metadata:
  name: wordpress-mysql   # will be used as a value in
  labels:                 # WORDPRESS_DB_HOST in wordpress-deploy.yml
    app: wordpress
spec:
  ports:
    - port: 3306
  selector:
    app: wordpress
    tier: mysql
  clusterIP: None

---
apiVersion: apps/v1
kind: StatefulSet
metadata:
  name: wordpress-mysql
  labels:
    app: wordpress
spec:
  selector:
    matchLabels:
      app: wordpress
      tier: mysql
  serviceName: mysql
  replicas: 3
  template:
    metadata:
      labels:
        app: wordpress
        tier: mysql
    spec:
      terminationGracePeriodSeconds: 10
      containers:
      - name: mysql
        image: mysql:5.6
        ports:
        - containerPort: 3306
          name: mysql
        env:
        - name: MYSQL_ROOT_PASSWORD
          valueFrom:
            secretKeyRef:
              name: mysql-pass        # the one generated before in secret.yml
              key: password
        volumeMounts:
        - name: db
          mountPath: /var/lib/mysql
  volumeClaimTemplates:
  - metadata:
      name: db
    spec:
      accessModes: [ "ReadWriteOnce" ]
      resources:
        requests:
storage: 1Gi
sudo kubectl create -f mysql-deploy.yml

service/wordpress-mysql created
statefulset.apps/wordpress-mysql created
3 pods are running
master1@k8s-master1:~$ sudo kubectl get pods
NAME                            READY   STATUS    RESTARTS   AGE
wordpress-mysql-0               1/1     Running   0          21s
wordpress-mysql-1               1/1     Running   0          19s
wordpress-mysql-2               1/1     Running   0          18s
4. Deploying WordPress
4.1. Installing LoadBalancer
Before deploying WordPress, let deploy metallb in order to access WP from outside of the cluster.
sudo kubectl apply -f https://raw.githubusercontent.com/google/metallb/v0.7.3/manifests/metallb.yaml
Creating configmap.yaml
apiVersion: v1
kind: ConfigMap
metadata:
  namespace: metallb-system
  name: config
data:
  config: |
    address-pools:
    - name: default
      protocol: layer2
      addresses:
      - 10.164.178.179-10.164.178.180
sudo kubectl apply -f configmap.yaml
sudo kubectl get pods -n metallb-system
4.2. Deploying WP
WordPress pods will be configured as a ReplicaSet.
# create a service for wordpress
apiVersion: v1
kind: Service
metadata:
  name: wordpress
  labels:
    app: wordpress
spec:
  ports:
    - port: 80
  selector:
    app: wordpress
    tier: frontend
  type: LoadBalancer

---
apiVersion: apps/v1 # for versions before 1.9.0 use apps/v1beta2
kind: ReplicaSet
metadata:
  name: wordpress
  labels:
    app: wordpress
spec:
  replicas: 3
  selector:
    matchLabels:
      app: wordpress
      tier: frontend
  template:
    metadata:
      labels:
        app: wordpress
        tier: frontend
    spec:
      containers:
      - image: wordpress:4.8-apache
        name: wordpress
        env:
        - name: WORDPRESS_DB_HOST
          value: wordpress-mysql
        - name: WORDPRESS_DB_PASSWORD
          valueFrom:
            secretKeyRef:
              name: mysql-pass          # generated before in secret.yml
              key: password
        ports:
        - containerPort: 80
          name: wordpress
        volumeMounts:
        - name: wordpress-persistent-storage
          mountPath: /var/www/html          # which data will be stored
      volumes:
        - name: wordpress-persistent-storage
sudo kubectl create -f wordpress-deploy.yml

service/wordpress created
replicaset.apps/wordpress created
3 pods are running
master1@k8s-master1:~$ sudo kubectl get pods
NAME                            READY   STATUS    RESTARTS   AGE
wordpress-h6pjb                 1/1     Running   0          21s
wordpress-lmrmh                 1/1     Running   0          19s
wordpress-nlncd                 1/1     Running   0          18s
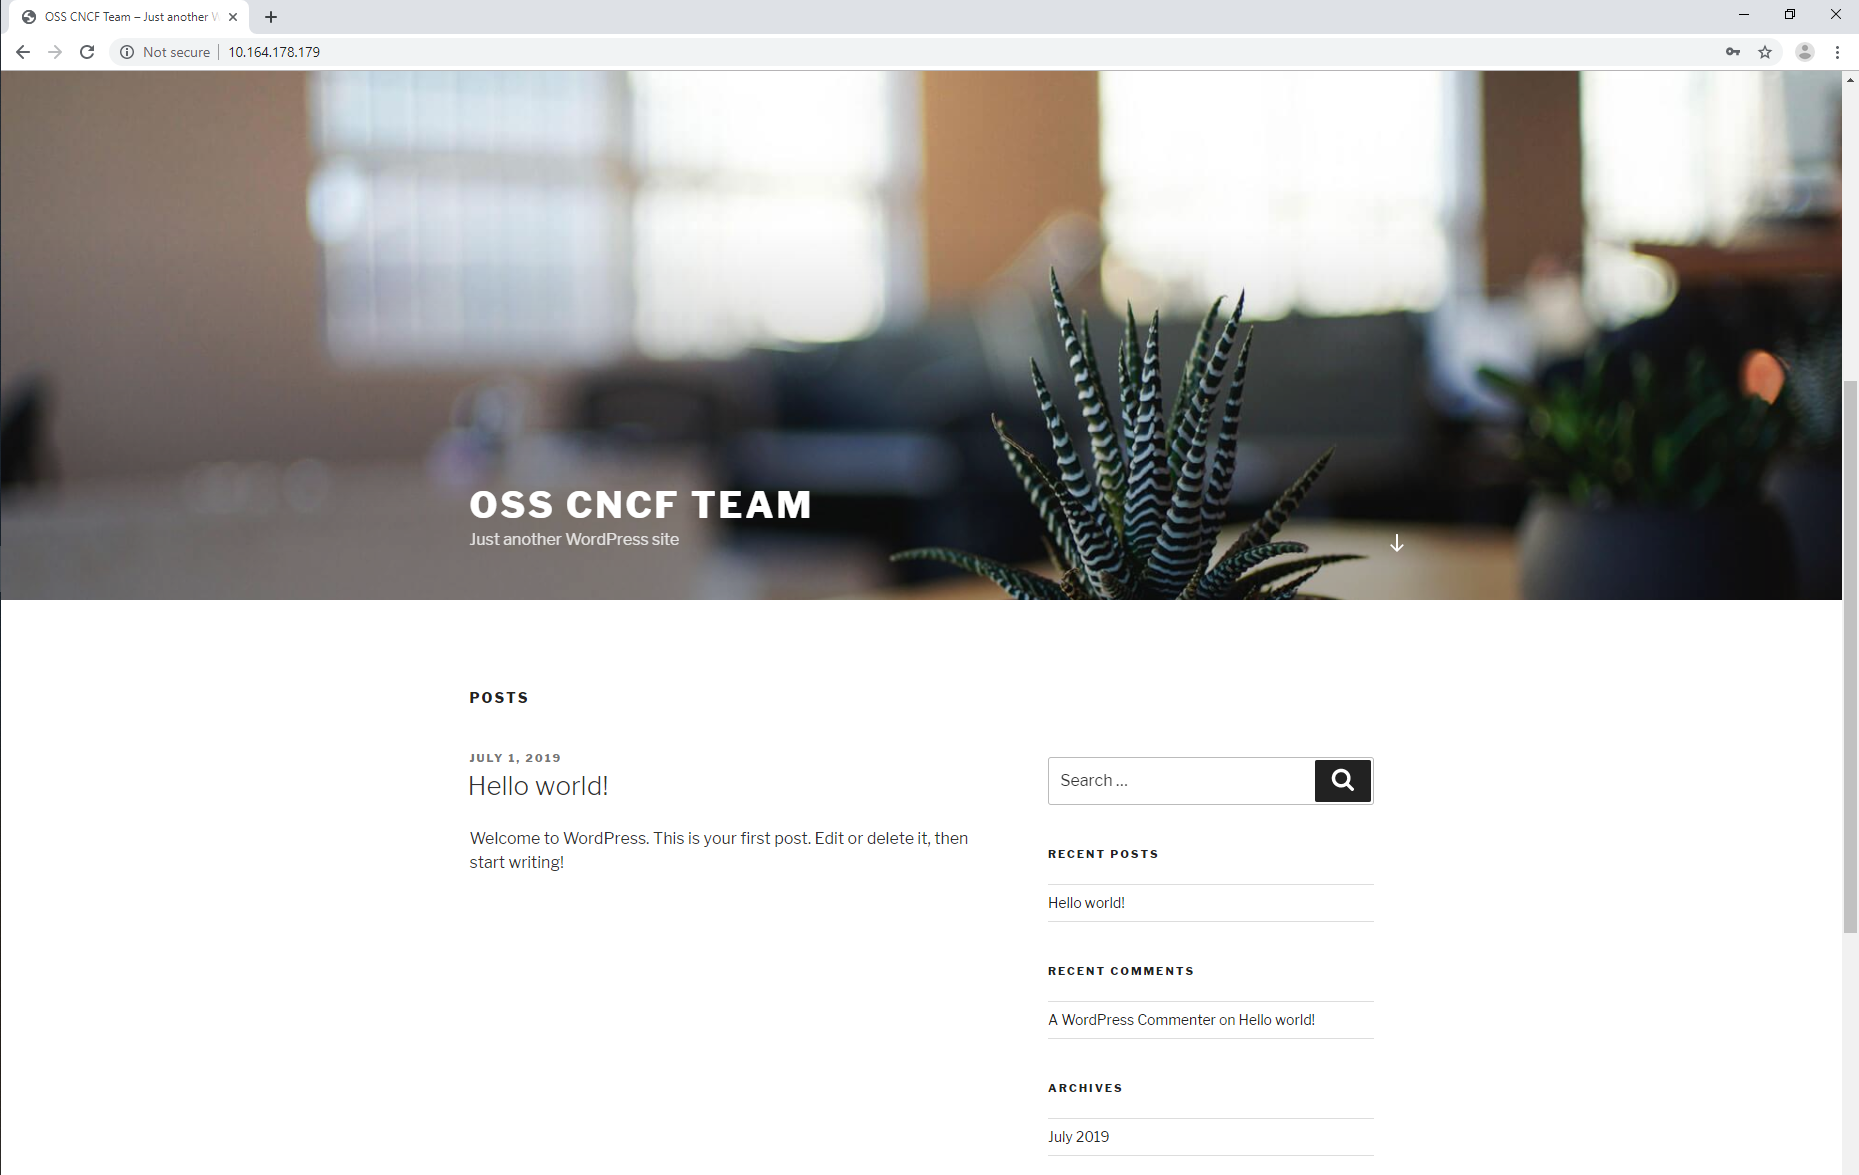
Service wordpress has type LoadBalancer and has a EXTERNAL-IP.
master1@k8s-master1:~$ sudo kubectl get svc
NAME              TYPE           CLUSTER-IP      EXTERNAL-IP      PORT(S)        AGE
kubernetes        ClusterIP      10.96.0.1       <none>           443/TCP        7d6h
wordpress         LoadBalancer   10.111.108.37   10.164.178.179   80:30273/TCP   15h
wordpress-mysql   ClusterIP      None            <none>           3306/TCP       16h
Done. Now we can access the WordPress site with address http://EXTERNAL-IP
5. References
[1] https://thenewstack.io/deploy-highly-available-wordpress-instance-statefulset-kubernetes-1-5/
[2] https://medium.com/@containerum/how-to-deploy-wordpress-and-mysql-on-kubernetes-bda9a3fdd2d5
Author:
Nguyen Hai Truong - Email: nguyenhaitruonghp[at]gmail[dot]com
Nguyen Phuong An - Email: annp[dot]cs51[at]gmail[dot]com